How I Converted Old Win7 Physical to VMWare Virtual with P2V : Working Method!

If you work in IT, particularly in server management, desktop support, or system administration, chances are you’ve faced this kind of issue at least once. I recently encountered a similar challenge while working on a small project, and today, I’m here to share how I converted an old physical Windows 7 computer into a virtual workstation using the P2V method.
Since a detailed A-to-Z explanation would make this article too long, I’ve focused only on the key technical steps to give you a concise overview.
Introduction
Hi there! My name is Sujan Thapa Magar, and I’m working as an Infrastructure Administrator at Tabcorp, one of the largest wagering company in Australia. This is my first article in the technical niche, so I hope you’ll find it helpful!
Now, let’s dive into the topic: What exactly is P2V?
P2V, or Physical-to-Virtual conversion, is the process of converting a physical machine into a virtual one. This is particularly useful when you have an old system, or you need to run multiple machines on a single host. While there are many guides online about P2V, this article is based on a unique case scenario I recently encountered. Despite weeks of research online, I couldn’t find a precise solution, so I came up with one myself and decided to document the process.
The Scenario
If you’re working with a modern operating system like Windows 10, Windows 11, or Windows Server (2012, 2016, or 2022), the P2V process isn’t too complicated. But in my case, I had to deal with an old system built back in 2007. This machine was running legacy software used for years by our software and web development teams, which wasn’t compatible with newer operating systems.
Instead of performing a fresh installation, we decided to clone the existing system and move it into our virtual node on VxRail. This approach allowed us to retain the legacy environment while leveraging modern virtualization platforms.
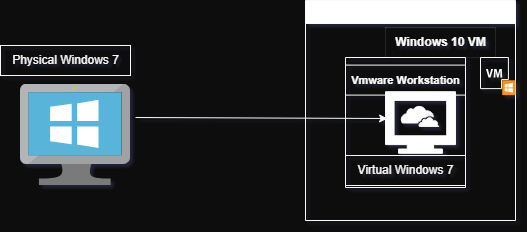
In essence, we were designing a nested VM — a VM inside another VM. Specifically, we installed VMware Workstation on Windows 10, and the goal was to transfer the physical Windows 7 system into this virtual environment.

The Process
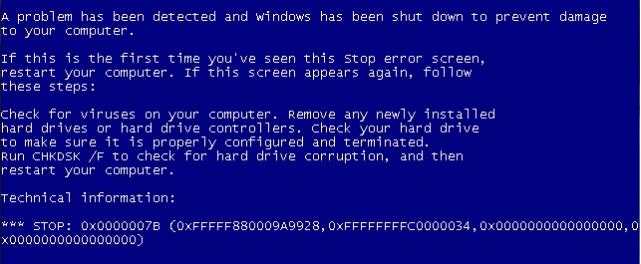
The first step was to convert the physical machine’s hard disk into a format compatible with virtual environments. For this, I used Disk2VHD, a tool from SysInternals, to create a virtual disk. I then loaded this disk into VMware Workstation. Unfortunately, the results were disappointing: the virtual machine showed nothing but a blue screen.

I tried several troubleshooting steps, including:
- Booting from Windows Recovery to troubleshoot the disk (e.g.,
chkdsk,sfc /scannow,rebuildbcd) — no issues were found. - Using Hiren’s Boot Media for disk correction tools — no luck.
- Creating a recovery image from the physical machine and loading it via recovery media.
- Trying multiple virtualization platforms, such as Oracle VirtualBox and Hyper-V.
- Loading the converted virtual disk onto the host machine and modifying
REGEDITvalues for controllers 1&2:HKEY_LOCAL_MACHINE\SYSTEM\CurrentControlSet\Services\msahci
- Matching the new VM specifications to the original physical machine (e.g., disk size, SATA controller, processor cores).
- Imaging the entire physical machine using Macrium Reflect and deploying it to a new virtual disk.
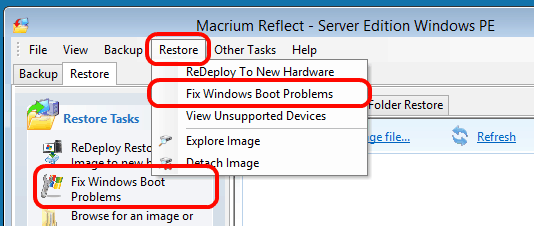
- Using Macrium Fix Boot Issues feature.
Despite all this, none of the methods worked. After spending weeks researching, I couldn’t find a definitive solution online.
The Breakthrough
Finally, it hit me: for a physical machine to run in a virtual environment, the physical machine must have virtual drivers installed. Similarly, the virtual environment must have drivers compatible with the physical machine’s disk controller. In my case, I needed to install an old SATA controller driver.
Here’s what I did:
- Used Macrium Reflect: I started fresh, deleted all previous attempts, and created a new Macrium image of the physical Windows 7 system.
- Restored that Macrium image to a new 500Gig Hard Disk so that it is visible in Macrium later.
- I extracted the VMware tools driver from my Host Virtual Machine which was in CD drive D folder: You can get this auto-installed on the VMWare workstation.
- Boot Macrium again and select the ReDeply To New Hardware Option from the Restore tab. Follow the prompts. It will discover the Windows 7 that we restored on a 500Gig Hard disk.
- Selected the Add Drivers option and installed the VMware tool drivers extracted before.
- Saved the changes: After installing the necessary drivers, I created an image of the modified virtual disk and loaded it into the new virtual machine.

The Result
The result? Absolute success! After seven days of continuous effort and failed attempts, the system finally worked. The old Windows 7 environment was running perfectly in the new virtual setup, and I couldn’t have been happier.
Closing Thoughts
I know this article may seem a bit technical for beginners, and some terms might feel overwhelming if you’re not familiar with these systems. The entire process is time-consuming and requires patience. There are multiple steps you need to research on each of these troubleshooting method but what I was covering was just an overview solution. However, if you’re facing a similar issue or need assistance, feel free to reach out — I’m always happy to help. Thank you for reading!